
Inspection Workstation Workbench Configuration Checklist: Desktop, Lighting, Pegboards, and Drawer Layout
Who Needs a Dedicated Inspection Workstation
Quality control technicians, fitters, and testing engineers in electronics, automotive parts, and hardware mold factories require workstations that support precision tasks, organized tool access, and stable load-bearing surfaces. A standard assembly bench often fails in inspection scenarios because it lacks the flatness, vibration resistance, and tool visibility that measurement and testing workflows demand.
This checklist helps facility managers and workshop supervisors configure inspection workbenches that meet real operational requirements—without over-specifying or under-building.
Step 1: Define the Load and Surface Requirements
Checkpoint: What is the maximum weight of the inspection equipment, jigs, and workpieces placed on the desktop simultaneously?
Inspection tasks in mold repair and testing workshops frequently involve heavy gauges, CMM fixtures, or cast iron surface plates. The desktop must resist deformation under sustained point loads.
- Heavy-duty inspection (mold repair, automotive parts testing):*
- A thick A3 steel plate desktop, ground flat, provides the rigidity and impact resistance needed for precision measurement. Cast iron platforms are an alternative when extreme flatness is required.
- General electronics or light-part inspection:*
- A composite desktop of raw steel plate over high-density fiberboard offers sufficient load capacity—typically rated for high total distributed load on a C-type cold-rolled steel frame—while reducing weight and cost.
Boundary: If your inspection involves calibrated surface plates or optical comparators, verify flatness tolerance with the workbench supplier before ordering. Standard industrial desktops are not precision-ground to metrology standards.
Next action: Measure the heaviest single item and the total distributed load. Specify desktop thickness and frame gauge accordingly. Guang'ErMei supports custom dimensions and frame sections using robust leg profiles and cross beams for heavy-duty configurations.
Step 2: Configure Pegboard and Tool Visibility
Checkpoint: How many hand tools, gauges, and fixtures must be visible and reachable within arm's span?
Inspection efficiency drops when technicians walk to a remote tool crib or dig through unsorted drawers. A pegboard mounted above or beside the work surface keeps frequently used items in sight.
- Single back panel with pegboard:*
- Suitable for wall-adjacent inspection benches. A square-hole pegboard accommodates hooks for calipers, micrometers, and go/no-go gauges.
- Inner half-pegboard storage cabinet:*
- When floor space is limited, a tall cabinet with an upper interior pegboard section and dual door-mounted pegboards consolidates tool storage vertically. Each shelf supports heavy loads, and adjustable shelf heights accommodate bulky test fixtures.
Boundary: Pegboards improve retrieval speed but require disciplined 6S management. Without shadow boards or labeled hook positions, tools migrate and the visual system degrades within weeks.
Next action: Audit the top tools used during a typical inspection cycle. Map them to pegboard zones before ordering. Request square-hole pegboard compatibility to ensure hook availability.
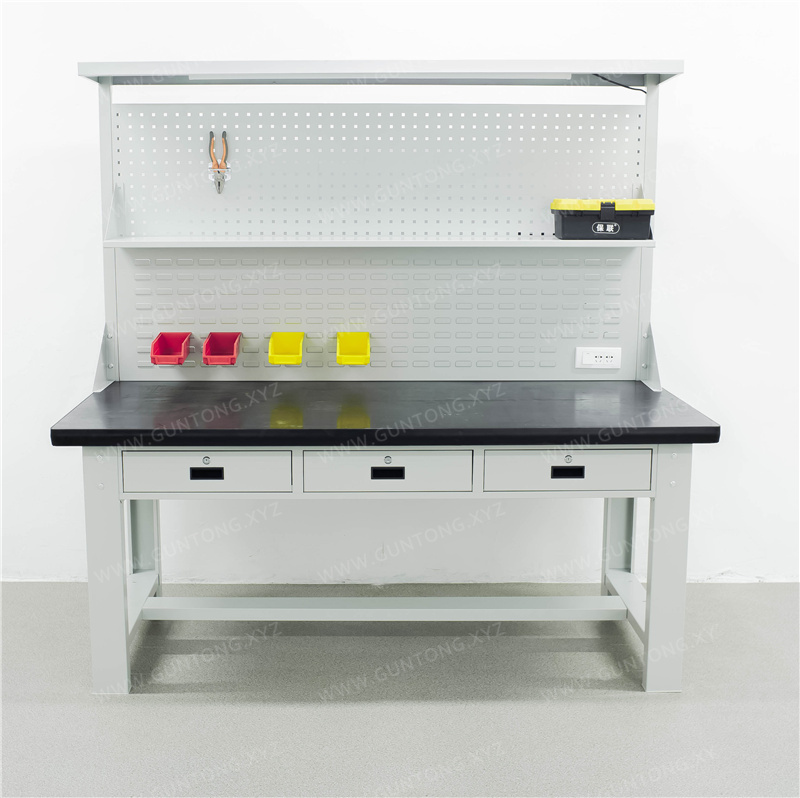
Step 3: Plan Drawer Layout for Consumables and Documentation
Checkpoint: Do inspectors handle multiple part numbers, test reports, or calibration certificates at the bench?
A multi-drawer configuration—such as shallow drawers for small gauges and deeper drawers for fixtures or sample parts—separates items by frequency of use and size. Drawer load capacity should be sufficient for most inspection tooling.
- Tiered drawer design:*
- Place high-frequency items (calipers, feeler gauges) in the top shallow drawers. Reserve deeper lower drawers for heavier fixtures or batch sample trays.
- Single-door compartment:*
- A side cabinet with adjustable shelf stores bulkier items like surface roughness testers or portable CMM arms, keeping the drawer bank dedicated to small tools.
Boundary: Drawer slides rated for light loads will sag under loaded conditions over time. Confirm slide rating and cycle-life specifications with the manufacturer.
Next action: List all items stored at the bench. Group by size and retrieval frequency. Match drawer heights to the tallest item in each group plus adequate clearance.
Step 4: Address Lighting and Ergonomics
Checkpoint: Is the inspection area lit adequately at the desktop surface, with no shadow zones from overhead pegboards or cabinets?
Inspection accuracy depends on consistent, shadow-free illumination. Overhead pegboards and storage cabinets can block ceiling lights, creating dark spots on the work surface.
- Integrated LED task lighting:*
- Mount a light bar under the overhead pegboard or shelf, angled toward the desktop. This eliminates shadows cast by the technician's hands and tools.
- Adjustable monitor arms:*
- For digital inspection readouts or SPC dashboards, articulating arms free up desktop space and allow screen positioning at eye level.
Boundary: LED color temperature matters. Use daylight-balanced lighting for visual defect inspection. Warm-white lighting masks surface scratches and color variations.
Next action: Conduct a lux meter reading at four corners and the center of the desktop. If any point falls below recommended inspection lighting levels, add task lighting before finalizing the workstation layout.
Step 5: Validate Frame Stability and Floor Anchoring
Checkpoint: Will the workbench experience lateral forces from leaning, clamping, or vibration-generating equipment?
Inspection benches supporting dial indicators or optical equipment must resist micro-vibration. A C-type cold-rolled steel frame with thick formed sections provides adequate rigidity for most scenarios. For environments with nearby stamping presses or heavy forklift traffic, consider:
- Floor anchoring:*
- Bolt the workbench legs to the concrete slab using expansion anchors.
- Cross-bracing:*
- Add diagonal braces between rear legs to reduce lateral sway.
- Anti-vibration pads:*
- Place neoprene or rubber isolators under each foot to decouple the bench from floor vibration.
Boundary: Anchoring is incompatible with workbenches that must be relocated for layout changes. If flexibility is required, specify heavy-duty leveling feet with locking nuts instead.
Next action: Identify vibration sources near the planned workstation location. If present, specify anchoring or isolation in the installation scope.
Common Configuration Mistakes to Avoid
| Mistake | Consequence | Correction |
|---|---|---|
| Undersized desktop for large fixtures | Overhang causes tipping risk | Specify adequate depth for fixtures with large footprints |
| Pegboard without shadow board | Tools lost, 6S audit failures | Add foam-cut shadow inserts or labeled hook positions |
| Drawers without dividers | Small gauges shift and damage | Request adjustable drawer dividers or foam inserts |
| Ignoring ESD requirements | Sensitive electronics damaged during inspection | Specify anti-static desktop laminate and grounding wrist-strap ports |
When to Request Custom Configuration
Standard inspection workbench dimensions suit most individual QC stations. Custom configuration is justified when:
- The inspection fixture exceeds standard depth or requires cutouts for cable routing.
- Multiple technicians share a single long bench and need partitioned zones.
- Cleanroom or food-grade environments require stainless steel frames and sealed drawer slides.
Guang'ErMei provides non-standard customization alongside standardized product lines, covering on-site workstation planning, load-bearing design, and 6S adaptation for manufacturing facilities across Guangdong and nationwide.
Summary and Next Steps
A well-configured inspection workstation balances desktop flatness, tool visibility, drawer organization, and lighting. Start with load and surface requirements, then layer in pegboard layout, drawer sizing, and ergonomic lighting. Validate frame stability against your facility's vibration profile.
If you are replacing aging benches or expanding a QC lab, request a site survey to confirm dimensions, utility routing, and anchoring feasibility before placing an order.