
Tool Organization with Pegboard Cabinets: A Practical Configuration Guide for Workshop Teams
When Tool Clutter Slows Down the Shop Floor
In electronics assembly lines, automotive repair bays, and hardware mold workshops, a common bottleneck is not the lack of tools—it is the time lost searching for them. Operators walk back to a central crib, dig through mixed bins, or borrow from a neighbor's station. Over a shift, these micro-delays compound into measurable productivity loss and 6S audit failures.
Tool organization with a pegboard tool cabinet addresses this by combining visual hanging storage with enclosed drawer and shelf space in a single footprint. The pegboard surface keeps frequently used hand tools visible and within arm's reach, while drawers and shelves secure heavier or less-used items below. This guide walks through how to configure such a cabinet for real workshop conditions, based on product specifications and field application data from Guang'ErMei Precision Components.
Diagnosing the Root Causes of Poor Tool Organization
Before selecting a cabinet, it helps to identify why tools are disorganized in the first place. Common causes include:
- Mixed storage zones.*
- Small precision tools, heavy wrenches, and consumables share the same drawer or shelf, making retrieval slow and increasing damage risk.
- No visual management.*
- Tools stored inside closed drawers or opaque bins leave operators guessing. New team members take longer to onboard.
- Static layouts.*
- A fixed shelf or hook arrangement cannot adapt when the product mix or maintenance task changes.
- Insufficient load planning.*
- Overloaded drawers sag or jam; underutilized shelves waste vertical space.
A pegboard-integrated cabinet solves several of these at once: the pegboard provides visual, flexible hanging positions, while tiered drawers and adjustable shelves handle items that cannot be hung.
How a Pegboard Tool Cabinet Is Structured
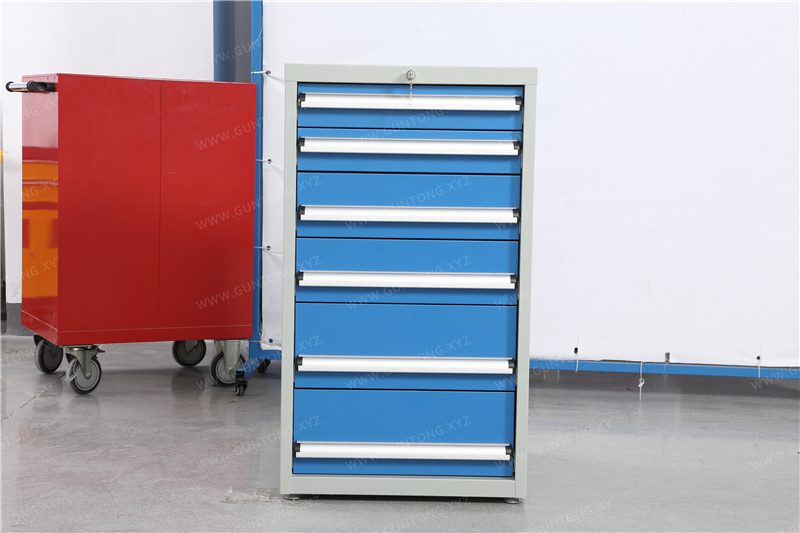
A typical workshop pegboard cabinet from Guang'ErMei combines three storage zones in one welded steel frame:
| Zone | Function | Typical Configuration |
|---|---|---|
| Pegboard panel | Visual hanging of hand tools, measuring instruments, and small fixtures | Square-hole pattern; hooks repositioned without tools |
| Drawers | Secured storage for heavier or precision tools | Tiered heights (e.g., 100 mm and 200 mm); stamped guide rails |
| Shelves or lower cabinet | Bulkier items, consumables, or sub-assemblies | Adjustable shelf positions; cold-rolled steel construction |
Key Specifications to Verify
When evaluating a pegboard cabinet for your floor, confirm these parameters against your actual tool inventory:
- Drawer load capacity.*
- Heavy-duty stamped guide rails can support up to 80 kg per drawer when opened to approximately 85% extension. This is sufficient for most hand tool sets, torque wrenches, and small power tools, but not for large die components or heavy motor assemblies.
- Drawer height options.*
- Standard configurations offer 100 mm, 150 mm, and 200 mm internal heights. Match these to your tallest tool category—calipers and micrometers fit in 100 mm drawers, while cordless drills and socket sets need 200 mm.
- Pegboard hole pattern.*
- Square-hole pegboards accept standard hook accessories and allow repositioning without drilling. Confirm the hole pitch matches the hooks you already use or plan to procure.
- Cabinet body material.*
- Cabinets constructed from 1.0 mm cold-rolled steel provide rigidity for daily industrial use. For environments with moisture, coolant splash, or washdown requirements, stainless steel variants should be considered instead.
- Mobility.*
- Optional 4-inch casters (two fixed, two swivel with brakes) allow the cabinet to serve as a mobile workstation. Lock the brakes during precision tasks to prevent drift.
Configuration Steps: From Tool List to Cabinet Layout
Step 1: Audit Your Tool Inventory
List every tool category used at the workstation. Group them into three tiers:
- High-frequency tools (used every cycle): screwdrivers, pliers, hex keys, torque drivers.
- Medium-frequency tools (used several times per shift): calipers, multimeters, specialty wrenches.
- Low-frequency or shared tools (used per job or per day): pullers, large socket sets, diagnostic cables.
Step 2: Assign Zones
- Pegboard:*
- Assign all Tier 1 tools here. Outline each tool's position with a shadow or label so missing items are immediately visible.
- Top drawers (100 mm):*
- Assign Tier 2 precision instruments. Use foam inserts or divider trays to prevent contact damage.
- Lower drawers (200 mm):*
- Assign Tier 2 heavier tools such as socket sets and cordless drivers.
- Bottom shelf or cabinet:*
- Assign Tier 3 items, consumable bins, or spare parts kits.
Step 3: Validate Load and Clearance
Weigh the heaviest expected drawer load. If it approaches 80 kg, verify that the guide rail specification matches (stamped heavy-duty rail, not light-duty ball-bearing slides). Ensure the cabinet's overall height—including the pegboard extension—clears any overhead obstructions such as lighting, ventilation ducts, or crane rails.
Step 4: Plan for Change
Reserve approximately 15–20% of pegboard holes and one drawer section as buffer space. When product models change or new maintenance procedures are introduced, this buffer prevents a full reconfiguration.
Application Scenarios
| Industry | Typical Use Case | Cabinet Focus |
|---|---|---|
| Electronics assembly | ESD-safe workstation with precision drivers, tweezers, and soldering tools | Anti-static pegboard hooks; shallow drawers for small instruments |
| Automotive repair | Mobile tool station for brake, suspension, and engine service | Heavy-duty drawers for socket sets; pegboard for wrenches and ratchets |
| Hardware mold maintenance | Die-setter's bench with hex keys, punches, and measuring tools | Mixed drawer heights; pegboard for frequently swapped punch sets |
| Vocational training | Student workstation with standardized tool kits | Shadow outlines on pegboard for accountability; locked lower cabinet for shared equipment |
Boundaries and Risks
- Do not exceed rated drawer load.*
- An 80 kg rating assumes even distribution. Concentrated point loads (e.g., a single 60 kg die block) can deform the drawer base.
- Pegboard is not for heavy hanging.*
- Items over 5 kg should be stored in drawers or on shelves, not hung on hooks, to prevent pegboard deformation.
- Standard sizes may not fit every aisle.*
- The default cabinet footprint (approximately 566 × 600 mm base, plus pegboard height) is designed for standard workshop aisles. Narrow-aisle or cleanroom environments may require custom dimensions, which typically extend lead time to 7–10 working days for non-standard fabrication.
- Color and finish.*
- Standard finishes are gray-white or blue. Custom colors are available but may affect production scheduling.
Next Steps
If your team is planning a workstation upgrade or a new production line layout, start with a tool inventory audit at one pilot station. Compare the current retrieval time against a pegboard-cabinet mockup. For load calculations, custom dimensions, or multi-station rollout planning, contact Guang'ErMei Precision Components with your tool list and floor plan—our engineering team can provide a configuration proposal and lead-time estimate based on your specific requirements.
Service coverage includes manufacturing customers in Huizhou and Guangdong Province, supporting nationwide workstation equipment customization and project delivery.