
How to Configure Tools on a Single Pegboard Steel Workbench: A Practical Setup Guide
Why Tool Layout Fails on Single Pegboard Steel Workbenches
In manufacturing, automotive parts processing, and hardware mold maintenance, a single pegboard steel workbench is often the central hub for daily operations. However, many workshops deploy these workbenches without a deliberate tool configuration plan. The result is predictable: frequently used tools end up scattered across the 5mm raw steel plate desktop, pegboard hooks are placed randomly, and heavier items overload the back panel—compromising both efficiency and safety.
The root cause is usually a mismatch between the pegboard's visual management potential and the actual workflow of the operator. A Single Back Panel Single Door 4-Drawer Steel Plate Workbench, for example, offers a composite desktop (5mm raw steel plate over 45mm high-density fiberboard) with a total load capacity of up to 1000 kg, plus a 500mm-high square-hole pegboard and four tiered drawers. When these elements are not configured as an integrated system, the workbench underperforms its design intent.
Step 1: Map Your Tool Inventory to Workflow Zones
Before hanging any tool, categorize your inventory into three tiers based on retrieval frequency:
- Tier 1 (High Frequency): Tools used in nearly every task cycle—wrenches, screwdrivers, calipers, hex keys. These belong on the pegboard within the operator's primary reach zone (approximately 400–700mm from the front edge of the desktop, at eye-to-chest height on the pegboard).
- Tier 2 (Medium Frequency): Tools used several times per shift—specialty pliers, torque wrenches, small measuring instruments. Place these on the upper or lateral sections of the pegboard, or in the top two drawers (typically 100mm height each).
- Tier 3 (Low Frequency / Heavy Items): Spare parts, large dies, or heavy fixtures. Store these in the lower drawers (200mm height) or the single-door cabinet compartment, not on the pegboard.
This tiered approach prevents the most common failure: overloading the pegboard with heavy or rarely used items that should be in drawer or cabinet storage.
Step 2: Configure the Pegboard for Visual Management
The square-hole pegboard on a single back panel workbench is designed for standardized hook systems. To maximize its effectiveness:
- Use consistent hook types. Standard square-hole hooks (compatible with 25mm pitch patterns) allow quick repositioning as workflows change.
- Outline tool silhouettes. Marking the shadow or outline of each tool on the pegboard behind its hook enables instant visual identification of missing items—a core principle of 6S workshop management.
- Reserve expansion space. Leave approximately 20–30% of the pegboard area unassigned during initial configuration. This accommodates new tools or process changes without requiring a full re-layout.
For workbenches in common dimensions such as 1500×750×800+500mm, 1800×750×800+500mm, or 2100×750×800+500mm (L×W×H, where +500mm is the pegboard height), the usable pegboard width matches the desktop length. Plan your hook grid accordingly.
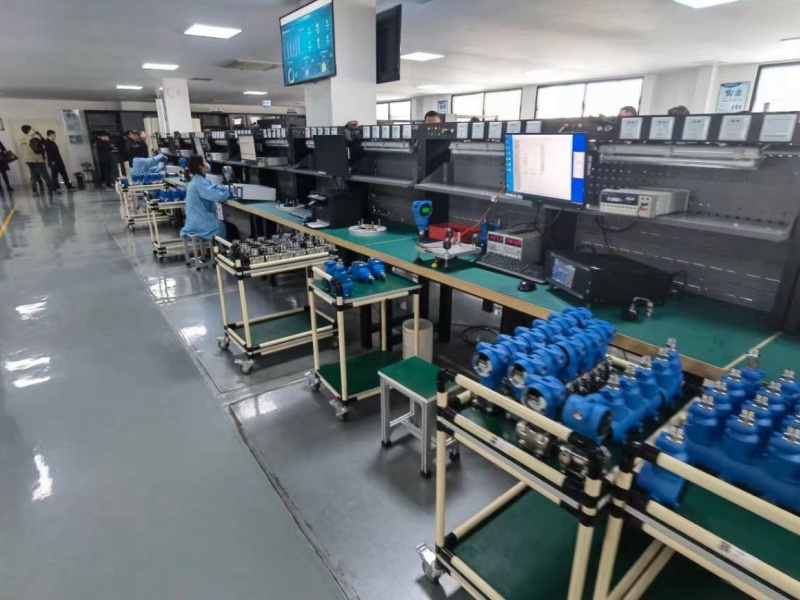
Step 3: Integrate Drawer Storage with Pegboard Layout
The four-drawer configuration beneath the desktop is not just supplementary storage—it is a load-balancing and workflow-completion mechanism. Configure drawers to complement the pegboard:
| Drawer Position | Recommended Content | Rationale |
|---|---|---|
| Top Drawer (100mm H) | Small hand tools, bits, inserts | Quick access without bending; pairs with pegboard Tier 1 tools |
| Second Drawer (100mm H) | Measuring instruments, gauges | Protected from dust and impact; medium-frequency retrieval |
| Third Drawer (200mm H) | Power tool accessories, cable ties, fasteners | Deeper storage for bulkier items |
| Bottom Drawer (200mm H) | Heavy fixtures, spare dies, lubricants | Lowest center of gravity; prevents tipping under load |
Each drawer on Guang'ErMei's steel plate workbenches is designed to support substantial loads, but always verify the specific drawer slide rating for your model. Overloading a single drawer shifts the workbench's center of gravity and can affect the C-type cold-rolled steel frame's long-term stability.
Step 4: Validate Load Distribution and Safety Boundaries
A steel plate workbench with a 1000 kg total load capacity is robust, but that capacity must be distributed sensibly:
- Desktop load: The 5mm raw steel plate + 45mm high-density fiberboard composite top handles heavy workpieces and clamping forces. Concentrated point loads (e.g., from a bench vise) should be positioned over the frame's cross-members.
- Pegboard load: The back panel is not rated for the same load as the desktop. Keep total pegboard hanging weight within reasonable limits—typically under 50 kg distributed across all hooks. Heavy items like large torque wrenches or impact drivers should be stored in drawers or on shelves, not hung on the pegboard.
- Frame stability: The C-type cold-rolled steel frame (100×50mm cross-section) provides rigidity, but uneven loading—such as all heavy tools on one side of the pegboard—can cause gradual frame deflection over time.
If your application requires a bench vise, confirm that the desktop thickness (approximately 50mm total) and the underlying frame support are compatible with the vise's clamping force and mounting bolt pattern.
Common Configuration Mistakes and Corrections
| Mistake | Consequence | Correction |
|---|---|---|
| Hanging all tools on the pegboard regardless of weight | Pegboard deformation; tools fall during operation | Move heavy tools to drawers; reserve pegboard for light-to-medium hand tools |
| No tool shadow outlines on pegboard | Missing tools go unnoticed; 6S audits fail | Apply silhouette markings behind each hook position |
| Drawers used as undifferentiated dump bins | Retrieval time increases; small tools get buried | Use drawer dividers or foam inserts matched to tool profiles |
| Pegboard hooks placed too close together | Tools interfere with each other during grab-and-return | Maintain minimum 50mm lateral spacing between adjacent hooks |
| Ignoring operator handedness | Right-handed operators reach across the body for primary tools | Mirror the pegboard layout based on the dominant hand of the primary user |
When to Consider a Dual-Pegboard or Extended Configuration
A single back panel pegboard is ideal for individual workstations in electronics assembly, automotive parts inspection, or hardware mold fitting. However, if your process involves:
- Two operators working simultaneously at the same bench
- More than 40 distinct tools requiring immediate visual access
- Integration with overhead power rails or pneumatic lines
...then a dual-pegboard or double-sided workbench configuration may be more appropriate. Guang'ErMei supports non-standard customization for these scenarios, including modified pegboard heights, additional drawer banks, and integrated lean pipe structures for material flow.
Next Steps for Workshop Planners
- Audit your current tool list and classify each item into the three tiers described above.
- Measure your available workbench dimensions (standard lengths of 1500mm, 1800mm, or 2100mm) and confirm the pegboard height (typically 500mm above the desktop).
- Draft a pegboard layout on paper or digitally before drilling or placing hooks.
- Request a configuration consultation if your application involves non-standard loads, cleanroom requirements, or anti-static tool management.
Guang'ErMei Precision Components provides on-site workstation planning, load-bearing design verification, and 6S-adapted tool configuration for manufacturing enterprises across Huizhou, Guangdong Province, and nationwide. Contact our engineering team to discuss your specific workbench configuration requirements.