
How to Choose 1500mm, 1800mm, and 2100mm Workbench Sizes for Workshop Layouts
The Sizing Mistake That Derails Workshop Layouts
A maintenance bay in an automotive parts plant has 3.2 meters of clear wall space. The planner specifies a 2100mm workbench to "maximize the surface." Within weeks, the seated technician cannot slide out without hitting the tool cart parked behind them, the overhead pegboard blocks the crane hook path, and the adjacent bay's operator has to walk around the bench to reach the parts shelf. The bench itself is structurally sound—the length decision was wrong for the workflow.
Deciding how to choose 1500mm, 1800mm, and 2100mm workbench sizes is not a matter of selecting the largest dimension the room allows. It requires calculating outward from the operator, the workpiece, and the circulation paths that surrounding equipment demands. Guang'ErMei Precision Components produces all three lengths as standard configurations—typically at 750mm depth and 800mm height—and the correct choice follows a repeatable diagnostic process.
What Each Standard Length Actually Supports
1500mm Workbench: Focused Single-Operator Stations
A 1500mm bench provides approximately 1.1 square meters of usable surface. This length is appropriate for:
- Single-operator electronics assembly where components, soldering irons, and inspection tools stay within a 600mm arm radius
- Bench-top inspection cells using microscopes, optical comparators, or CMM probes
- Rework and soldering stations where the operator remains seated throughout the shift
- Tight maintenance bays where a tool cart must roll behind the operator without requiring them to stand aside
The 1500mm length keeps every tool reachable without lateral movement. When configured with a single back panel and a 4-drawer under-bench cabinet, the total footprint stays compact enough for high-density workshop grids.
1800mm Workbench: The Versatile Middle Ground
At 1800mm, the work surface expands to roughly 1.35 square meters. This length accommodates:
- Two operators working side-by-side on separate sub-assemblies that converge at a shared central fixture
- Single-operator heavy maintenance where large components—gearboxes, valve bodies, motor housings—must be laid out alongside hand tools and diagnostic instruments
- Fitter stations requiring a bench vise at one end and a layout or marking surface at the other
The 1800mm size is the most frequently specified length across general manufacturing because it balances usable surface against aisle consumption. In a standard 3-meter bay, it leaves sufficient clearance for a tool cart to pass without the operator stepping aside.
2100mm Workbench: Extended Layouts and Multi-Fixture Work
A 2100mm bench delivers approximately 1.58 square meters of work surface. This length is justified when:
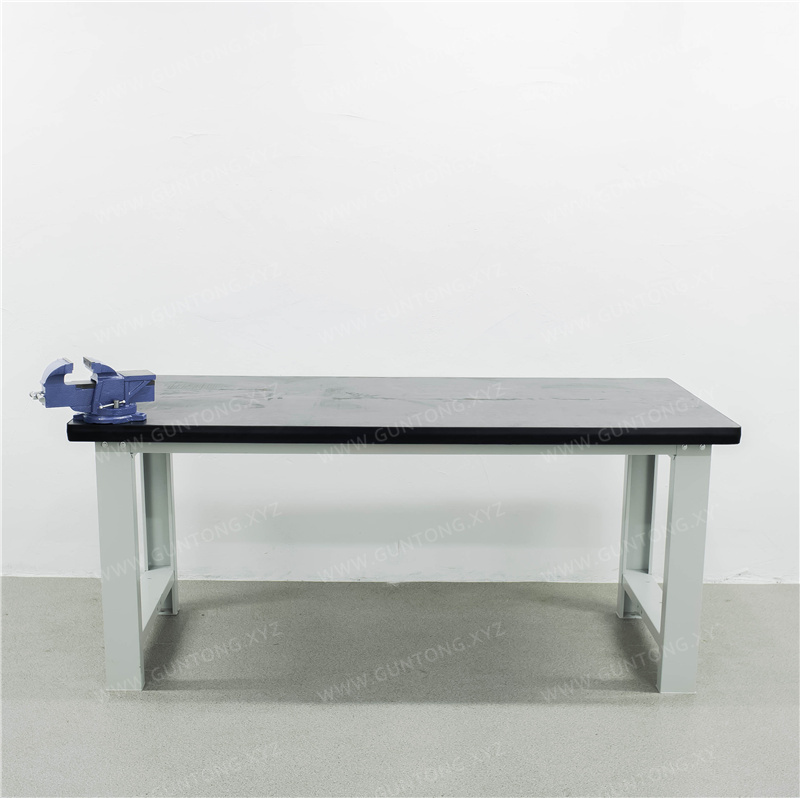
- Multiple fixtures or jigs must remain mounted simultaneously, as in automotive parts testing or hardware mold tryout
- Two operators work on the same large assembly from opposite ends—common in wiring harness layout or control panel fabrication
- The bench doubles as a staging area where incoming parts queue on one side while finished assemblies exit on the other
The trade-off is floor space. A 2100mm bench with a rear pegboard and overhead light boom requires at least 3.6 meters of bay width to maintain safe circulation. Planners who specify this length without verifying aisle clearance create bottlenecks that persist for the life of the layout.
A Five-Step Decision Checklist
Before issuing a purchase order, workshop planners should work through the following sequence.
Step 1: Map the Operator Envelope
Measure the lateral space a single operator occupies while performing the task—including reaching for tools on a pegboard or turning to a side cart. A seated electronics assembler needs roughly 900mm; a standing fitter using a vise swings through 1200mm. If two operators share the bench, add their envelopes plus a 200mm buffer. The result is your minimum bench length.
Step 2: Audit the Workpiece Footprint
Place the largest workpiece—or the full set of fixtures that must remain mounted—on a floor template. Add 300mm on each side for hand tools and measurement instruments. If the total exceeds 1500mm but stays under 1800mm, the middle size is the correct call. Resist the temptation to round up to 2100mm unless the workflow genuinely requires the extra surface.
Step 3: Verify Aisle and Overhead Clearance
Workbenches do not exist in isolation. A 2100mm bench with a 500mm rear pegboard consumes 2.6 meters of depth from the wall. Add the operator's standing depth (approximately 600mm) and the minimum passing aisle (800–1000mm). If the total exceeds the bay depth, downsize to 1800mm or reorient the bench perpendicular to the wall.
Step 4: Match Load Class to Frame Specification
Longer benches concentrate more weight on the frame. Workbenches are classified into light-duty models supporting up to 300 kg and medium-to-heavy-duty models rated for up to 1000 kg. A 2100mm bench loaded with three heavy fixtures at mid-span demands the same frame integrity as a 1500mm bench with a single concentrated load. Confirm that the frame specification—such as 40×40×1.2mm square tube—matches the expected load distribution, not just the total weight.
Step 5: Plan for Configuration Growth
Workshops that standardize on a single length gain flexibility: benches can be relocated between bays without re-cutting floor anchors or re-routing power drops. If your facility anticipates layout changes within two years, standardizing on 1800mm across most bays—reserving 1500mm for dedicated inspection cells and 2100mm for fixed heavy-assembly stations—reduces future reconfiguration cost.
Quick Reference: Length Selection Matrix
| Decision Factor | 1500mm | 1800mm | 2100mm |
|---|---|---|---|
| Operators per bench | 1 | 1–2 | 2 |
| Largest single workpiece | < 500mm | 500–900mm | > 900mm |
| Minimum rear aisle needed | 800mm | 900mm | 1000mm+ |
| Typical load class | Light (≤300 kg) | Medium to heavy (≤1000 kg) | Heavy (≤1000 kg) |
| Pegboard or overhead frame | Optional | Common | Almost always required |
Common Sizing Mistakes and How to Avoid Them
Mistake 1: Specifying 2100mm because the wall is long enough.
Wall length is not the constraint—operator circulation is. Always calculate from the operator outward, not from the wall inward.
Mistake 2: Ignoring pegboard and accessory depth.
Workbenches can be flexibly configured with overhead cabinets, pegboards, electrical panels, light booms, adjustable feet, casters, and shelving accessories. A standard square-hole pegboard adds 500mm to the bench depth. A 2100mm bench with pegboard and overhead frame can consume over 3 meters of bay depth. Verify this against your floor plan before ordering.
Mistake 3: Overlooking anti-static grounding requirements.
In electronics assembly, the workbench surface must dissipate static to ground. Anti-static workbenches use a conductive desktop mat connected to an earth point, and the frame must maintain electrical continuity. This requirement applies equally to all three lengths but adds configuration steps that affect lead time and installation scope.
Mistake 4: Assuming all three lengths share identical lead times.
Standard configurations in 1500mm and 1800mm typically ship faster because they are produced in higher volume. If your project timeline is tight, confirm availability for 2100mm units or plan the layout around the more readily available sizes.
When Custom Dimensions Become Necessary
Standard lengths of 1500mm, 1800mm, and 2100mm cover the majority of workshop scenarios. Custom lengths become necessary when:
- The bay dimension forces a non-standard size (e.g., 1650mm to fit between two structural columns)
- The workpiece is unusually long and narrow, such as extrusion cutting or pipe assembly
- The bench must integrate into an existing lean-pipe rack system with fixed upright spacing
Guang'ErMei supports non-standard customization alongside its standard product line, with design adjustments to frame spacing, drawer configuration, and desktop material to match the specific application. For non-standard sizes, contacting the engineering team early in the planning phase ensures structural and load-bearing requirements are addressed before production.
Next Steps for Workshop Planners
- Measure your bays. Record clear wall width, bay depth, and overhead obstructions for each planned workstation.
- Map your workflows. Identify operator count, largest workpiece, and required tool storage for each task type.
- Apply the five-step checklist to assign a target length to each workstation.
- Request a layout review. Guang'ErMei's engineering team can validate your sizing decisions against load capacity, clearance, and 6S management requirements before production begins.
For detailed specifications on standard and custom workbench configurations—including steel plate composite desktops, anti-static options, and drawer-tiered storage—contact Guang'ErMei Precision Components to discuss your workshop layout.